Showing posts with label Before and After. Show all posts

Wednesday, February 15, 2012

Before & After & Valentine's Day

Last year when I had a booth at Slate I sold this vintage chinoiserie-style cabinet. It had a very ugly formica top.

The buyer just sent me pictures of her "after" and it looks great! I love seeing old pieces given new life :)
cabinet

She had the piece re-stained with an ebony finish. She added some gold paint along the trim and then topped it with an antiqued mirror to cover the formica. I love it! (I also love that lamp she put on it.. I asked where she got it, and sure enough... Slate!)

I hope everyone had a great Valentines Day! We don't ever do much or spend much, but we have a little tradition of having breakfast for dinner. A little "sweet" way (literally) to end the day.. it started way back in college, and I love it.

photo

Mmmm... Mimosas and French Toast :)

Even though we don't do gifts, my husband surprised me with Season 2 of Downton Abbey. We are currently obsessed with this show!

Tuesday, November 29, 2011

A Personal Design Project Before & After

By the time you are reading this we are most likely back home in Charlotte from our Thanksgiving break in Texas with my family. We were there for 11 days and during that time I worked on a very special decorating project... my parents master bedroom!

A little background - I have mentioned before I come from a family of engineers and doctors. I guess you could call me the "black sheep". My dad is a computer engineer/programmer, my mom is a mathematician. She tutors math and is writing a math text book. One brother is a doctor and the other is a mechanical engineer. And then there's me.. ha!

My parents have never been into decorating and have had their current bedroom suite for 10+ years. I was so excited when they finally asked me to help them revamp their room. We had SO much fun doing it and they love the result.. which is the best part! It's very nerve-wracking decorating for your parents ;) I love the result, too and it was fun letting them see me in action.

Here are the before shots. My dad was cleaning out his desk and wasn't too excited to be in the pictures.. sorry Dad!!

001

002

005

As I mentioned, they have had this teak bedroom set FOREVER! Time for a change. We were on a tight budget.. here are the things we did to change up the space:

- New furniture (bed, nightstands and dresser)
- New neutral, solid bedding
- Rearrange Current Artwork
- Curtains

Here are the afters!

009 copy

The artwork made my job easy. All the pieces were painted by either my grandmother or my great-grandmother. My parents previously had the paintings all around the room but I grouped them together to create a focal point above the bed. Two of the frames were previously brass but we painted them espresso to modernize the frames.

014 copy

The case goods and bed were purchased at Weirs in Plano, Texas. I picked out the furniture (along with the approval from my parents). I LOVE the dresser and nightstands we found... they look so much more expensive than they were.

I originally suggested a linen upholstered bed but we settled upon this one. In the end I'm glad we did, it helps anchor the room.

030

022 copy

The nightstands are very large and works really well with the scale of the king sized bed and large room.

011 copy

A collection of my parents books that fit them perfectly..
027

Not only are my parents smart, they are both wonderful musicians. My mom plays the flue and my dad plays the guitar. Making room for their music things were important.
024

Here is all the info for the quick project:

Bed, Dresser & Nightstands - Weirs - $1,556
Accent Chair - World Market - $125 (we got it on sale)
Curtains - IKEA Ritva - $35 per panel ($70)
Curtain Hardware - IKEA Beskada (I kept the caps on and didn't use the finials) - $18
Lamps - Home Goods - $40 each ($80)
Bedding - IKEA Malou - $50
Throw Pillow on Accent Chair - IKEA - $17
Existing Wall Color - Ralph Lauren Beach

Total: $1,916 (our budget was $2,000)

Thanks Mom & Dad!! I had soo much fun!

Tuesday, May 10, 2011

A Settee & Steroids

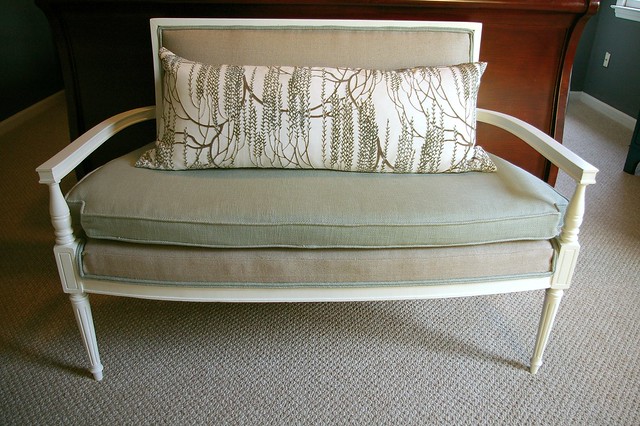
This settee before & after is a long time coming. I purchased it about a year ago not knowing what to do with it. Here is the before:


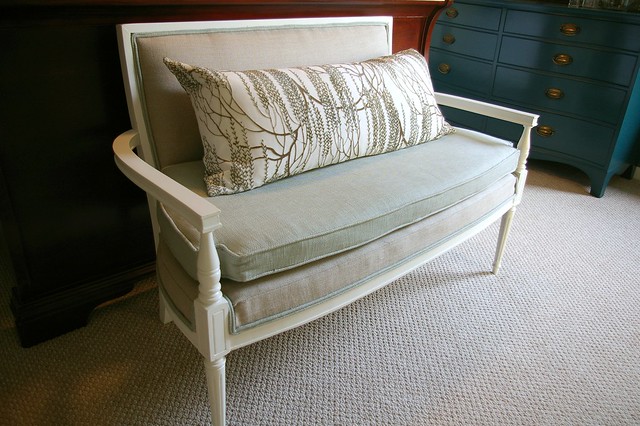
And here is the after:


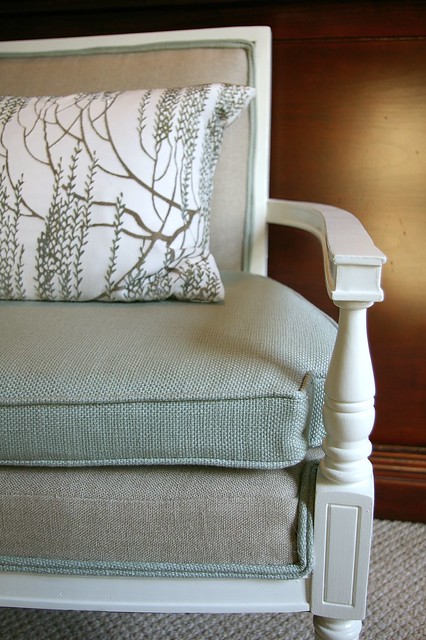
It sits at the end of our bed in our master bedroom. I love how it turned out! It got a fresh coat of white paint and I used two different fabrics... the green/blue is the same color that is in the skirted bedside table fabric.


I am a sucker for details.. I had my upholsterer double welt the settee in the contrasting seat fabric.

I'm very happy with the settee, but I'm pretty sad today. Charlotte seems to have hurt her back again (read all about the first time here). She's on some serious medication, including steroids. It makes her act completely high and not herself, not to mention she's in a lot of pain. I'm praying she gets better.. because I don't even want to think about the alternative. She is everything to us.. please pray for her!


A very sad dog. :(

Thursday, April 14, 2011

The worst befores you'll ever see in your life

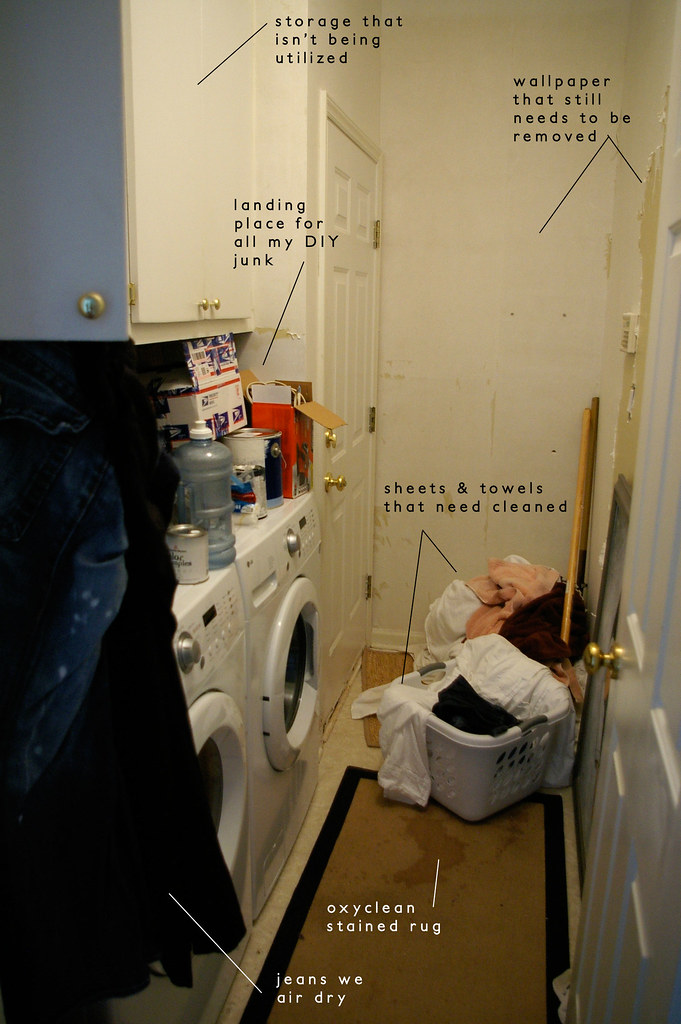
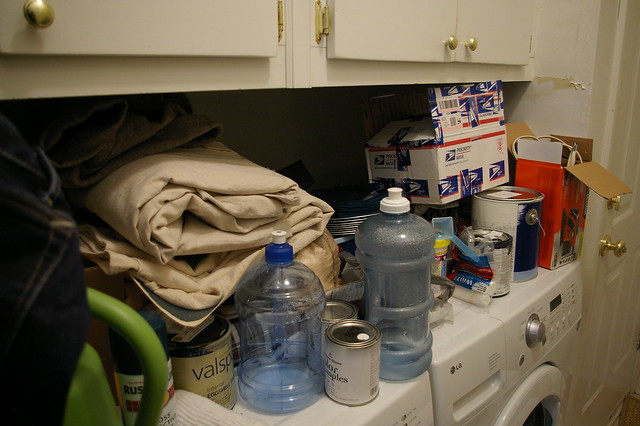
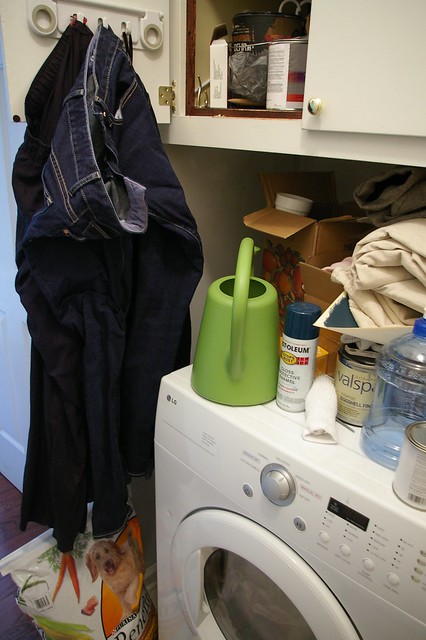
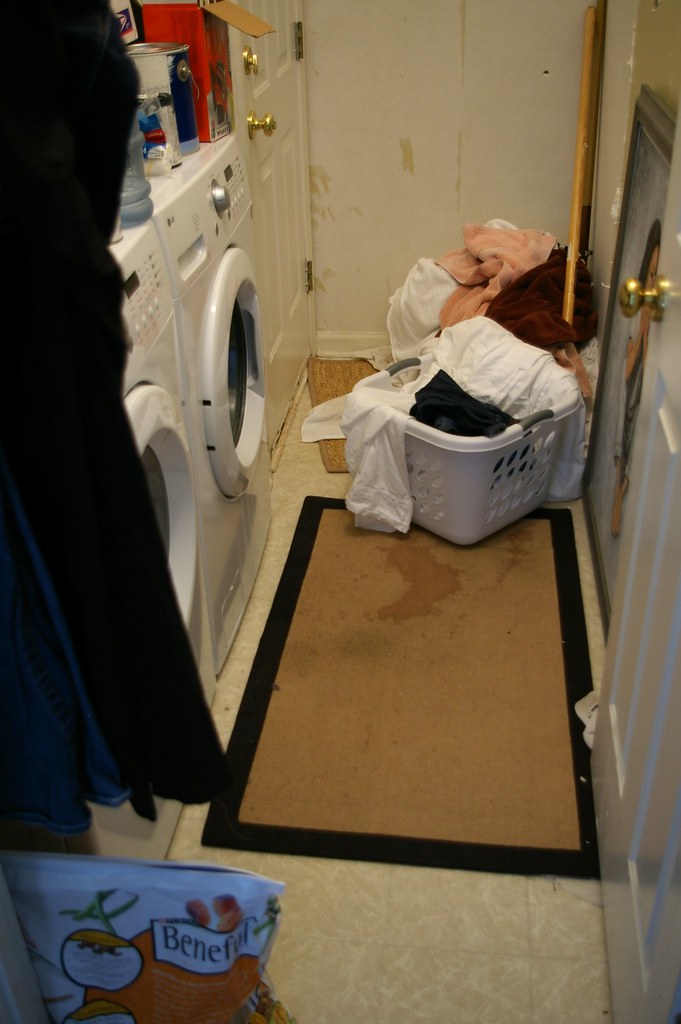
I have a (literally) dirty little secret. See.. our home for the most part is clean and organized. We have neighbors that we adore that may pop over at any minute, so that helps us keep a clean, presentable house. But there is one room that is a disaster zone. I'm talking tornado-just-hit-call-the-news disaster.

And for some reason, I'll claim temporary insanity, I'm going to share this room with you. But if you are familiar with my blog, you know I like to keep things real.

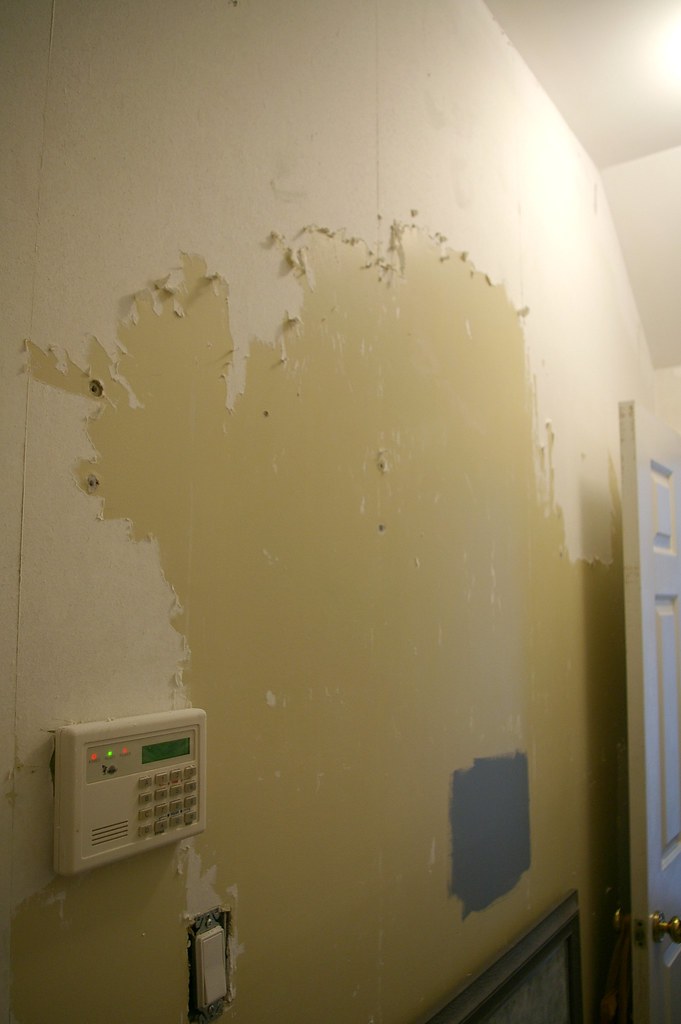
Introducing, the laundry room.


If I was a sane person, I would have cleared all the junk out and then taken before shots.. but that's not real. This is what it looks like all the time. It's a space that isn't functional and that needs to change.

The worst part is, we keep our adult beverages in the fridge in the garage so when we have company, we have to pass through this space to get a beer. It's EMBARASSING. Even though it's just a laundry room, it gets seen more than I'd like it to.

As I've mentioned before, my mother in law is coming out at the end of the month to help me makeover this space. Although, now that I have shown these pictures to the world, she may cancel her flight and disown me ;)

The biggest project on our list is to rip up the vinyl flooring and lay tile. Then we'll organize and make this space FUNCTIONAL and pretty :) Because tiling will take the majority of her time here, husband and I are going to clear out the room, take off the remaining wallpaper backing and paint this weekend.

Ohh this will be fun!

Monday, November 22, 2010

Guest Room Dresser - The After

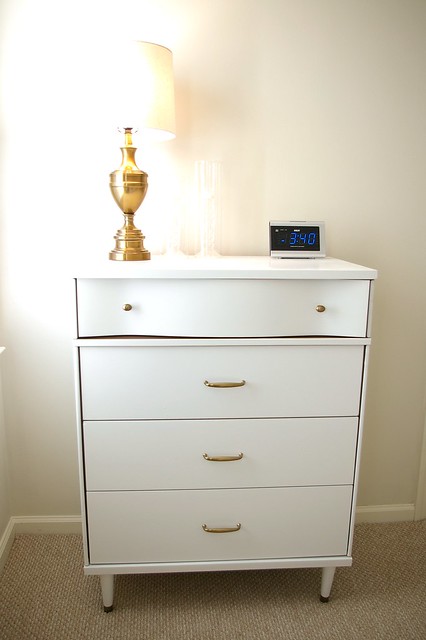
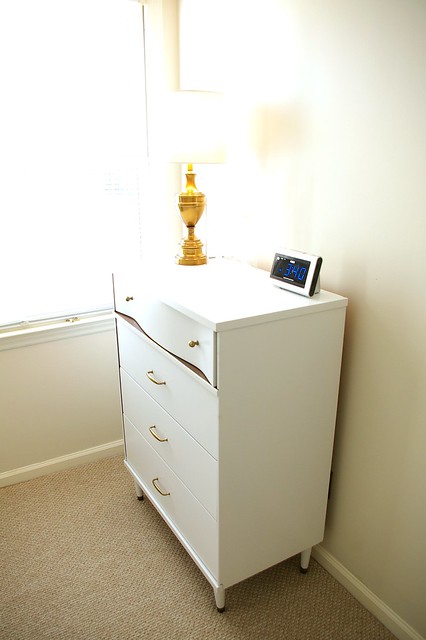
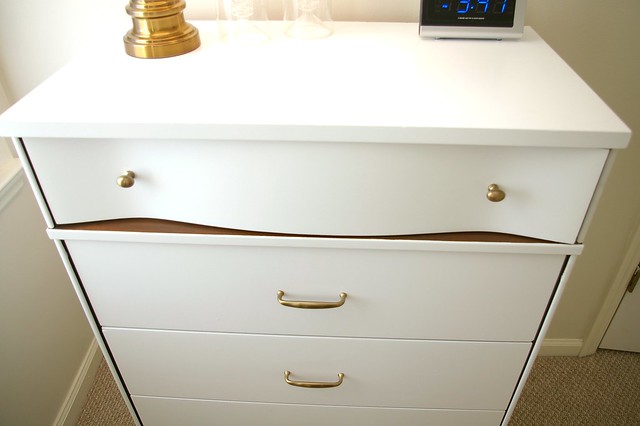
I decided to paint the dresser all white and add some gold hardware.


Nothing too fancy.. except when I put the drawers back in, I realized I didn't paint under the curved dresser white. It was a happy mistake, because I really like that little peek of natural wood!


I really like how it turned out!

I finally painted to room, also. The paint color is "Vintage Linen" by BEHR. The hardware is the Ephram collection from Restoration Hardware.

A "Before" & Some Art

I have just a "before" for you this morning... and it's borrowed from Design*Sponge. But when I saw this dresser on Design*Sponge a while back I was surprised - I had that EXACT same dresser sitting in my garage!


Why don't I have the after for you? Well... my in-laws are staying in our guest room which is where the dresser is right now ;) I could have been a prepared, good blogger and snapped a picture yesterday for today's post.. but I didn't. So I will be posting the "after" this afternoon!

In the mean time, I thought I'd show you a painting I just whipped up. I was inspired by this piece at Mrs. Howards:


I took a piece of wrinkled paper used for packing and went to town. This is the result:


I'll be back later with the dresser after!

Thursday, January 28, 2010

Before & After

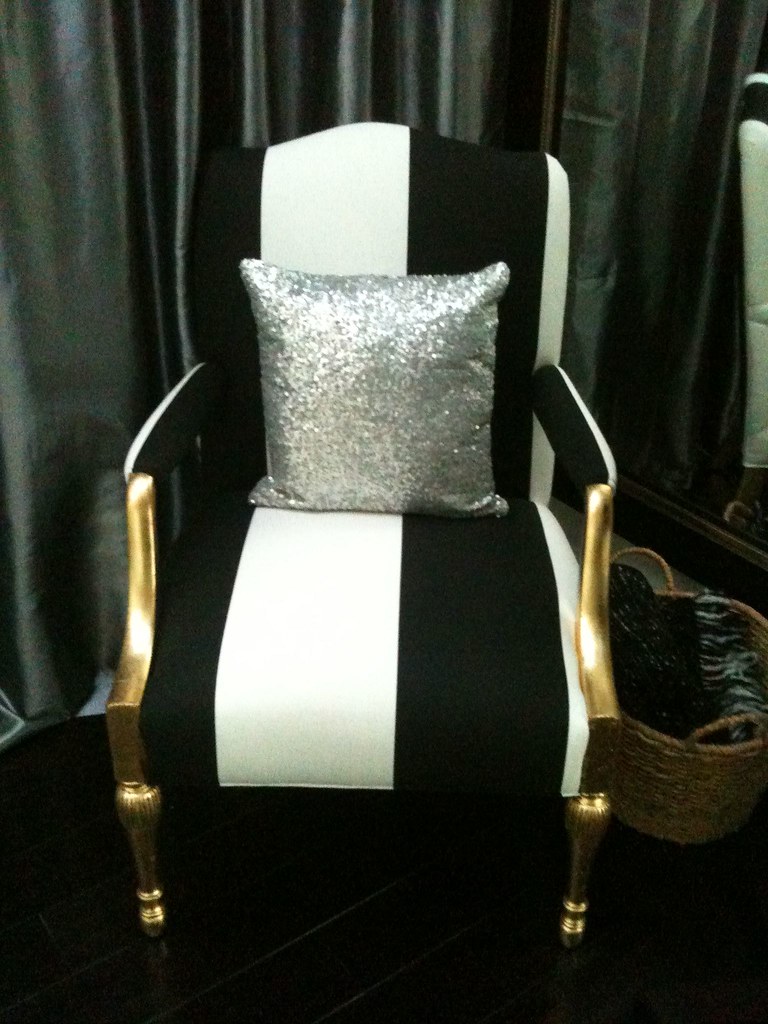
Remember my post about gold leafing the $50 Salvation Army chair?

Here is the before:


And here is the after:


Unfortunately, for now, I only have a poor quality iPhone picture. I really love how it turned out!! Yes, that's TWO exclamation points :) I was so pleased my upholsterer understood my vision when I mentioned I wanted an offset stripe.

The home this chair belongs to has been shot and I will share the photographs as soon as I get them! But for now... more packing!

Tuesday, November 4, 2008

Reader WWYD: TV Room

So, I've been thinking about doing a inexpensive fix-it in our Family room. I've disliked this room for a while, it's a little too "country/traditional" for my taste now. Since I can't change the rug and couch ($$) I've focused in on the other items. I've already gotten rid of half the sectional and re-painted/re-hung the mirror. Both of these improvements have been worth it.


My next idea is to paint the tv stand and the side table gray. I got the idea from the fab Eddie Ross, I just love his gray chairs.


Luckily, there is some gray in the rug. I also want to replace the legs on the tv stand to something a little more sleek, and perhaps the hardware too.

What do you think?

Repaint them? Or think of another (inexpensive) option?

Saturday, November 1, 2008

Mission Organization

I've made a goal to get ORGANIZED. See, I have a dirty little secret. I'm clutter-phobic - on the outside. Confused? In the things I see day to day, I HATE clutter: knick-knacks, unnecessary wall hangings, ornate decorations that just sit there for no reason. A clean, functional space makes my heart flutter. Like this space.

But when it comes to behind closed doors, I'm a MESS! Remember that Friends episode with Monica and her secret closet? That's me. But I'm trying to cure this disease.

Katie over at Hyper Homemaker has made it easier with her Ultimate Fall Cleaning Challenge! Today's challenge was to tackle the kitchen, and that's exactly what I did.

So I cringe as I show this to you, but here are my before and afters!

{click on images to see larger}

POTS & PANS

My first tackle was my pots and pans. We have great pull out drawers, but given our tiny kitchen it's still hard to keep these drawers organized. But I manged to do it after only around 15 minutes!

PANTRY

Second was the pantry. This one took a little longer, but was definitely worth it! I love cleaning out the pantry, it's such a good feeling. (ps- Katie I think I rival you for smallest pantry!)

We've actually done a pretty good job of keeping our glasses and dishes organized, so I'd thought I'd share with you our system (those wire shelves are the BEST!)

KITCHEN CABINETS


Believe it or not, it took me less than an hour to tackle both these projects. So I decided it was a good idea to move on to the hall closet.

The hall closet was one of the most cluttered spaces in the entire house. It was the place that we put everything we didn't know where to put. (That and the garage, but that's another story and another chore for another day).

Since we don't technically use coats here in CA, I decided to make this closet our....... SHOE closet! We've spent too many days hauling piles of shoes upstairs to find them collecting back downstairs by the stairs. So I figured - what the heck, why don't we just store them downstairs in the "coat" closet??

I'm so glad I did this - it turned out so great and I know it will make our lives simpler. (Plus we can practice taking of our shoes off right when we get in the door to help keep our floors clean, an added bonus!)

ENTRY/HALL CLOSET


All in all it was a very productive day and organization makes me feel so much better!

Sunday, August 24, 2008

Busy Weekend!

I was busy with [budget] home projects this weekend!

First up, I painted my future art room/guest room white. It's funny how growing up I hated plain white walls, and now I love it.

I took a picture, but it did not turn out too well due to lighting. Here it is - my blank canvas. I have so many ideas swirling around in my head about what to add to this room to pull the white together, this is definitely a work in progress!


The before:


I also needed to do something with the guest bathroom. I didn't love having a shower curtain in there since it cut out the natural light, so when I saw these curtains in the new Ikea catalog, I knew they would be perfect!


We get so much natural light in this bathroom, and it pours into our hallway, so these curtains work perfectly.

The before:


All in all it was a productive weekend :)

Sunday, July 27, 2008

How To: Hang an Art Wall

Normally I'm one of those people who puts 10 holes in the wall just to hang two pictures, so I knew I would have to do something different to successfully hang an art wall. What I came up with was SO successful I just had to share!

Materials Needed:
- Sharpie/Marker
- Craft paper or wrapping paper (I used the cheap white wrapping paper roll from Target)
- Scissors
- Tape (nothing that will peel off paint, I used the kind you wrap presents with)
- Pencil
- Level
- Hammer and nails

1.) It all started with a plan:

I drew out the sizes I bought and the arrangement I wanted - I highly recommend starting with a blueprint like this.

2.) Place each frames individually on the wrapping or craft paper, trace around the frame with the pencil and then cut out.

3.) Place the paper on top of the back of the frame, locate the hook with your finger, and draw a dot where the nail would hang on the hook.


4.) Tape the pieces of paper up on the wall according to your plan. It's easiest to work from the inside - out.


5.) Once you have the locations all mapped out and leveled, nail in the nails into the paper where the marked holes were.


6.) Pull the paper off the wall and replace with frames - and you are DONE!


I absolutely LOVE how it turned out - and the best part was I only put 12 holes in the wall - exactly the amount needed to hang all the frames. It also was a fast process - I had the frames from the box to the wall in an hour!

Keep checking in to see all the artwork I put in the frames - I'm still working on collecting the perfect prints :)

(I'm also working on persuading Matt to let me replace the ugly leather office chair with a sleek modern one... unfortunately he's terribly attached to the big black one.)
Related Posts Plugin for WordPress, Blogger...