

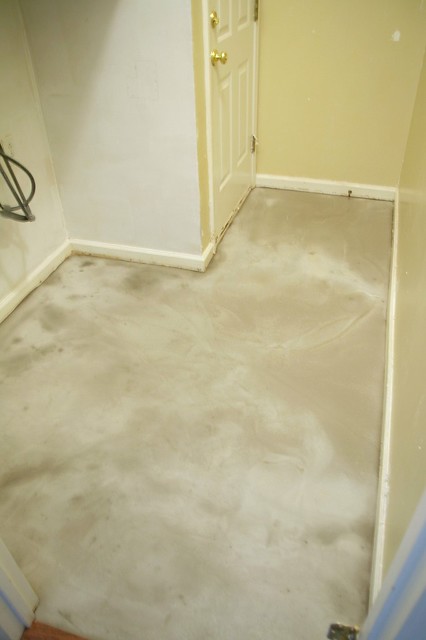
In the morning, I came downstairs to find the self-leveling floor set and dry:
MIL and I got everything ready to mix the tile adhesive. During this step we had some issues, I am not going to lie.
When we originally purchased our materials, an employee at Home Depot helped us pick it all out. However, we ended up purchasing the LARGE size (50 lb bag) of tile adhesive. Yesterday we proceeded to try and mix said bag in our paint bucket. There was way too much mix in a way too small bucket. And there was way too much mix for our little room! It ended up splattering EVERYWHERE and we weren't able to mix it. We tried separating it out into two buckets but in the end it wasn't salvageable. We just had no idea what we were doing.
Here I am, giving up, with mix all over me and two buckets full of un-usable mess:

Well... you live and you learn. We went to Lowes (because it was closest to our house) and talked to an employee there. He showed us what size we actually needed for our small job and told us how to mix it slowly so it mixes together smoothly.
(as a side note - I really like both Home Depot and Lowes.. we just happened to have a more helpful person at Lowes for this project).
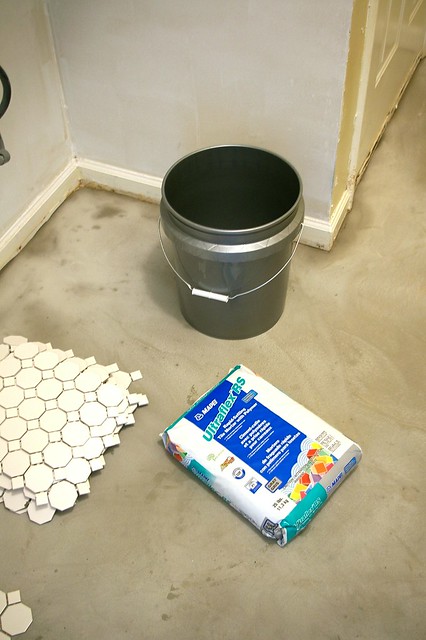
Here is a shot of the new items we got at Lowes:
We decided to mix only half the bag to make sure we were doing it right.
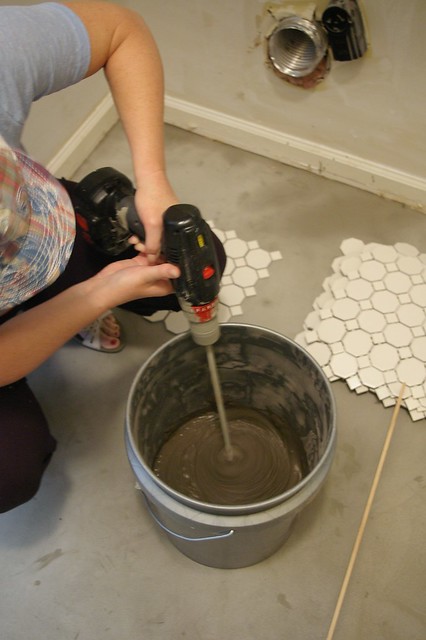
Ohhh that's what it's supposed to look like! :)
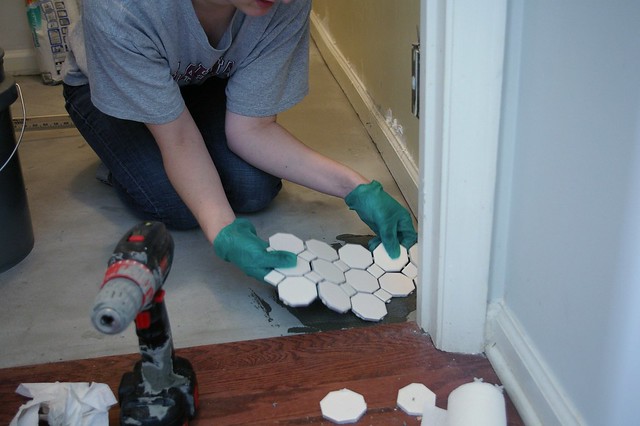
Once we got the adhesive figured out, we got to tiling!
Laying down the first piece.. man I was nervous (and I ditched those gloves in like two seconds. My hands are killing me because of it.. but it was easier to work without them):
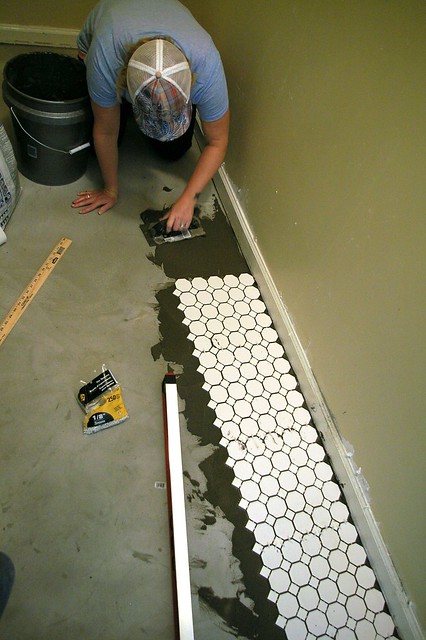
After a short while, we got the hang of it..
I borrowed a tile cutter from a neighbor of mine. I ended up only having to cut a few pieces. Can you believe it? I can't!


(The shoe moulding covers the small little gaps around the perimeter in case you were wondering)
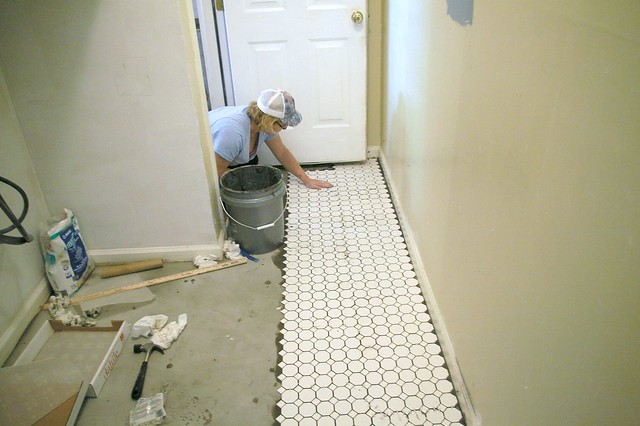
And there is the almost-finished product! Of course we still need to grout, then add the shoe moulding. Oh and then paint the room, etc. But we are really happy with how it looks so far.
Phew. Time to relax!


All of that hard work paid off. It looks totally amazing.
ReplyDeleteRashon aka Mr. Goodwill Hunting
Beautiful!! Great choice of tile, and it looks like a professional job! Way to go!! Ready to do your kitchen??!!
ReplyDeleteWhat a great tile choice! It's coming along great!
ReplyDeleteLooks great! I think DIY is always about living and learning and making at least two extra trips to the store :)
ReplyDeleteYou are so brave and inspiring! Not to mention so likable! Thanks for sharing your experience. Keep up the good work.
ReplyDeleteIt looks damn good! Now come over and tile my second bathroom :)
ReplyDeleteBryn, it looks great! Perfect tile choice; it looks really good next to your wood floors. And thanks for the play-by-play. Not only is it helpful, it's so fun to see the progress!
ReplyDeleteLooks great!! Can't wait to see the room complete!
ReplyDeleteI think you choose the perfect tiel for your space!! It looks great already :)
ReplyDeleteGreat job- you chose a gorgeous tile! You should pat yourself on the back and enjoy a restful weekend. :)
ReplyDeleteWow! I am impressed!
ReplyDeleteholy! That kind of job just looks so indimidating to me. You must be really proud of yourself!
ReplyDeleteSuper impressed Bryn! This is always something I have wanted to try but it seems really scary! Your lucky you had someone to take the plunge with you. Can't wait to see the finished room!
ReplyDeleteIt looks great! Love your tile choice. Can't wait to see the finished product!
ReplyDeleteThat looks so good! I LOVE that tile. Really looking forward to seeing it after grout and shoe moulding!
ReplyDeleteLOVE how you keep it real!!! It looks AWESOME already, can't wait to see the final product!! GIRL POWER!!!!
ReplyDeleteAwesome job ladies!!! GIRL POWER!!!! Can't wait to see the final product!!
ReplyDeleteThat looks so good. Amazing job! The tile was a beautiful choice :)
ReplyDeleteBryn...my husband and I picked out that EXACT tile from Lowe's a couple of weeks ago, but when we tested it out in our hall bath, the white tile had more of a pale peach/cream color to it against the white cabinetry and white trimwork. We even went to The Tile Shop to get a sample of their version of the white hexagon (only difference was that the diagonals in between the hexagons were high gloss. When we compared the Lowe's sample with the TS sample, the TS was bright white while the other remained peach-colored. All that to say, we were so bummed! I actually got the idea of using it from your friend who used it and I just loved it. We ended up going with an 18 x 18 porcelain (very spa-like), and my husband began cutting the tile with the wet saw this evening. Just laying the backer board w/ thinset took several days!
ReplyDeleteGood luck! Your laundry room is going to look gorgeous with those floors!
nice blog!
ReplyDeleteYour mother in law is awesome for helping you! Looks great!
ReplyDeleteBryn! I'm excited to see how your laundry room turns out. Love, love love the tile! Classic.
ReplyDeleteI'm excited to see how your cabinets turn out using the chalkboard paint. I've contemplated a chalkboard wall in my own place for ages but have been too scared to actually go for it!
Love your blog! So many fresh ideas!
Dan
http://www.danmitchellstyle.blogspot.com
It looks fantastic. I've been wanting to try tiling for awhile now. Good to know about how to mix the adhesive.
ReplyDelete