

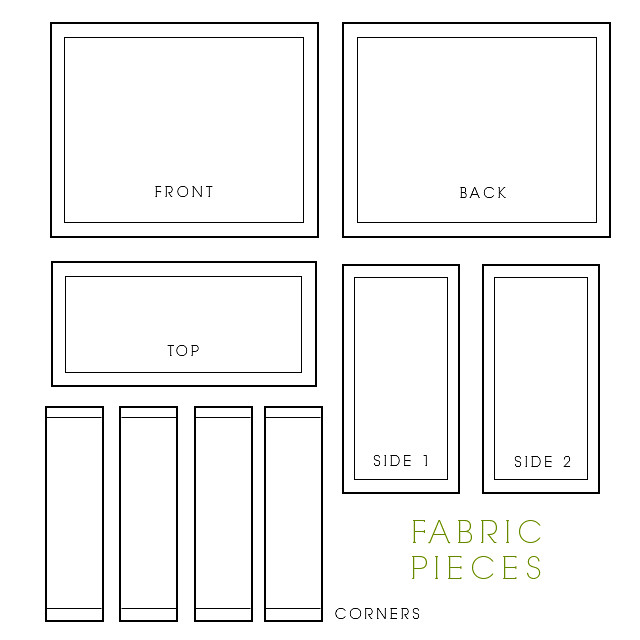
This project is fairly easy but time consuming. It may not be the best way to do it, but I searched all over the internet to find tutorials but found none. So I decided to just wing it and used common sense. Before I go into the details, it's pretty much just sewing 9 rectangles together (four sides, a top, and four corner pieces).
First, you need to figure out what to use as your table. I knew I wanted something large and tall just like this from Wisteria:

They sell the base for it, which looks like this:

I thought about purchasing it but it was too wide and way too expensive. $150 just for the base! I thought about making something myself, but I didn't want to go that route. So when my dad the engineer was here over Christmas, we took off to IKEA to find something that would work. After searching the entire store with measuring tape, we found this:

It was perfect! The small EXPEDIT for only $40. The best part - it has shelves for storage so we can tuck magazine and books in it.
Okay let's begin!
STEP ONE - MEASURE & CUT
This step made the entire process EASY. I wanted my lines and hems to be perfectly straight and even, so I used the actual bookcase as my guide.
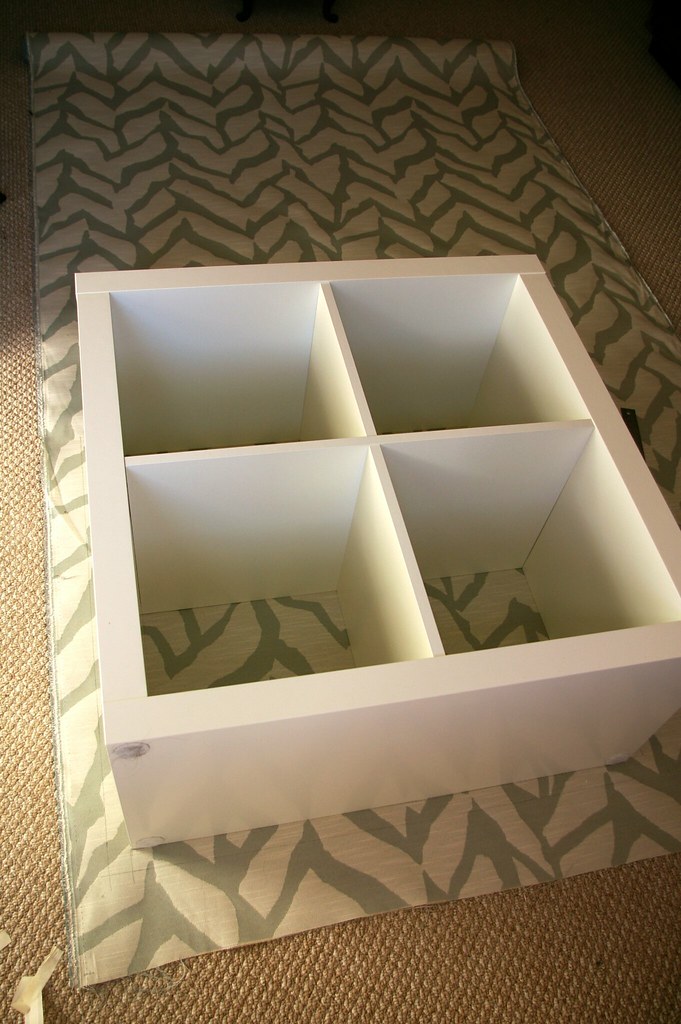
I took a pen (test first to make sure it doesn't bleed) and traced the perimeter of the bookcase.
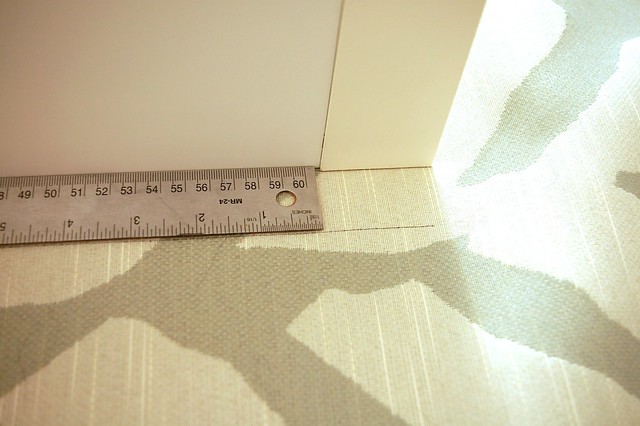
Then, I drew another line all the way around with a ruler. You are going to do this for each piece of the table.
Now cut around the line that you drew with the ruler. The perimeter you drew with the ruler is the allowance for your hem.
To make the corner pieces, I traced the size of a front piece, and then cut it four equal pieces.
Once you are done with your step, you are going to have pieces that look like this:
STEP TWO - IRON YOUR HEMS
It is crucial to iron to make sure you have straight, even hems. Iron the SIDES and the BOTTOM of each piece. You will not be ironing the top. I'll explain below.
Fold over both sides and bottom once (like pictured.. basically you're folding half the width of the ruler.) Don't fold over the top. Then iron.
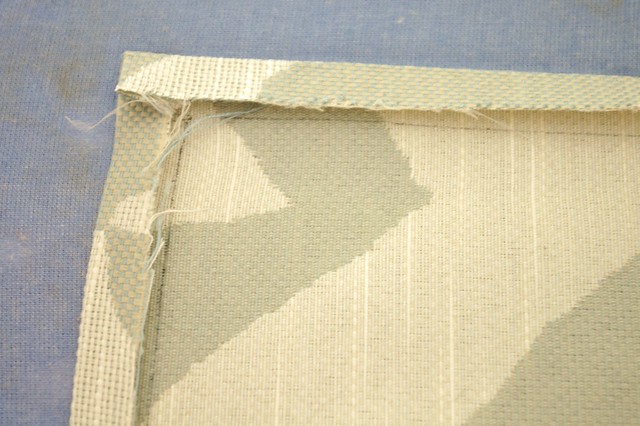
Now, you are going to fold over ONLY the sides again. You'll be folding over the width of the previous fold.. it works out that you'll be ironing where the line is (but it will be hidden).
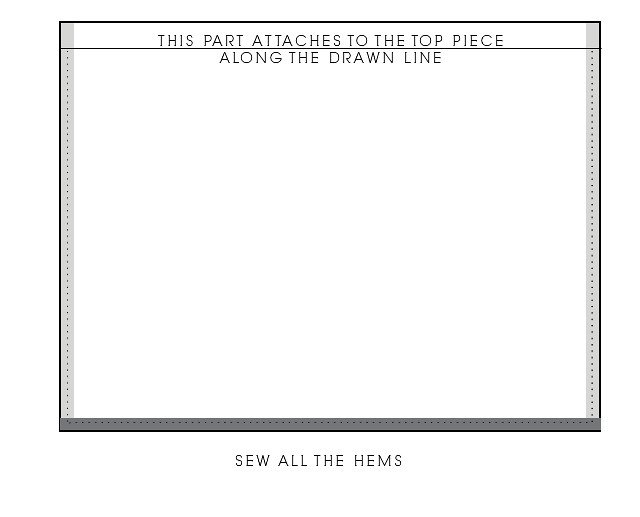
Here is what it will look like when you're done:
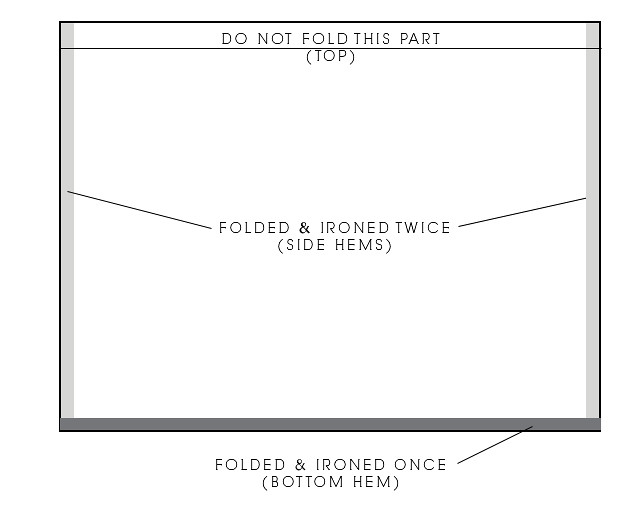
The reason you aren't folding the bottom over twice is because it will be too short. This gives you an extra half an inch so you won't have any high-water skirted tables.
You are going to do this on each piece you cut out (except for the top).
Hopefully I haven't lost you yet.
STEP THREE - SEW
Now that your hems are ironed, all you need to do is pin and sew!
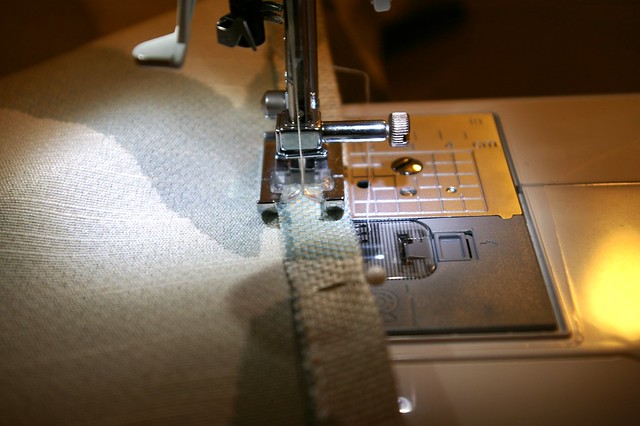
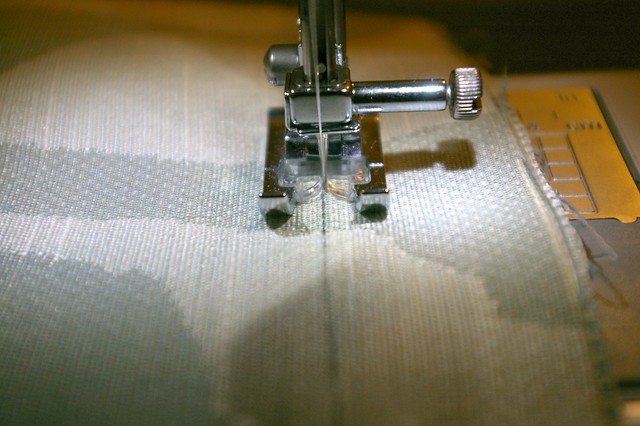
This is a picture of me sewing the bottom hem, see how it's only folded once? You will have a raw edge, but only on the bottom. That's okay.
Once your hems are sewn on each piece, it's now time to attach it to the top. Lay your top down so that it's right side up. Then lay the side down on top of it so it's wrong side up. Both the right sides will be touching. Like this:
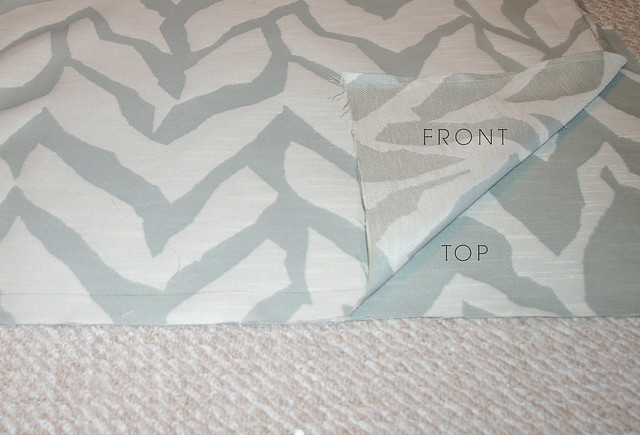
Make sure the edges are lined up!
Now pin and sew along the line you've drawn:
Do this to each side, front and back.
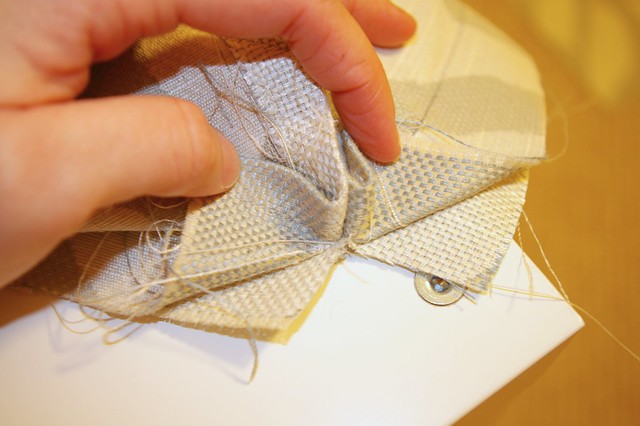
Once all the sides are attached, I cut the corners away from the top so they don't hang out when on the table. Just like this:
Now you'll have a somewhat done skirt! Congrats! All you need to do now is add the corners.
STEP FOUR - ATTACH CORNERS
The corners are the pieces that peek through when on the table.
I'm sorry, I don't have any pictures of this step. At this point I just wanted it done and forgot to take them! But it's pretty easy. All I did was put the skirt on the table inside out, and hung the corners down so that they are level with the fronts and sides. I pinned the corners onto the inside pieces of the top (the part that you never folded and ironed). If this part intimidates you, no one will ever see it so you can use fabric glue to attach those pieces. I just did quick little stitches to attach the pieces.
Again, be sure when you are attaching the corner pieces, they are not attached to any part of the skirt that shows. You are attaching them to the "unfolded hem" of the top.
When you flip the skirt back the right away, the corners will be peeking through!
And that's how I created my skirted tables!! I hope it's not too confusing.

I'm not completely done yet - I'm having glass tops made and I'm also going to be creating the little tabs with buttons but I need to get some button covers.
Some extra notes:
- If your piece is too large to actually put on the fabric, you can create your own templates by tracing each side of the piece with kraft paper, then lay the kraft paper on the fabric and trace, then trace the outer line with the ruler.
- If your fabric is expensive, you can always use a different, less expensive, fabric for the backs if they are just leaning up against the wall.
- You may be thinking F this, I'm just going to do a non-sew skirt. But (in my personal opinion), the difference in quality and appearance of a sewn piece and a glued piece is night and day.. and to me, sitting at the sewing machine creating something is relaxing and rewarding :)
Please let me know if you have any questions!


Such a great tutorial, and your end result is beautiful. Cannot wait to see it with the tabs too. I will be bookmarking this for future use--maybe someday?!
ReplyDeleteThanks for the step by step instructions! Your bedroom is looking so much better, with the new additions.
ReplyDeletevery nice! can't wait to see it with the top and buttons
ReplyDeleteBryn, they look amazing. And for the zillionth time, I wish I had not rejected Grandma's sewing lessons. :)
ReplyDeletegreat job... not too confusing... I felt the same way when I did a tutorial for a slipcover chair, like I was just rambling on and losing everyone! Can't wait to see it completely done... love the fabric too and especially teh wall color, so pretty and dramatic!
ReplyDeleteYou totally lost me, but I am just extremely slow when it comes to sewing. They look great, though!! You are way more patient than me. :)
ReplyDeleteGreat instructions! I love the fabric! ;)
ReplyDeleteSo informative, Bryn, thank you! I love the suggestion of using a kraft paper template. Makes a lot of sense when you are working with spendy fabric. The bedside tables look fantastic!
ReplyDeleteI love this look (especially with the fabric you chose to use!)... Thanks for such an extensive tutorial - next time I'm up to pulling out the sewing machine I'll have to give this project a try for covering my bedside table. Looks great!
ReplyDeleteTHANK YOU for posting this! I know how much time a step-by-step post like this takes, so thank you for writing up all of your helpful tips! I can't waitt o try this out...fun times ahead.
ReplyDeleteThanks so much for posting this! Very helpful. I love the fabric you used. The table I'm planning to cover is a similar size to yours - about how much yardage did you use?
ReplyDeleteI keep daydreaming about a pleat in the front and ribbon trim (for my own) but we'll see if I get that brave! I'm only recently reacquainted with the sewing machine (just posted a pillow tutorial yesterday and getting my feet wet!)
Maggie,
ReplyDeleteThank you!
I used 5 yards for this project (two skirted tables) but used a drop cloth for the back of the tables since they are up against the wall. hope this helps!
looks beautiful. great tutorial.
ReplyDeleteSewing is so rewarding, but I'm biased. Good job on the tables, Bryn!
ReplyDeletethat fabric is fabulous. i also love to sew... a skirted table might be my next project now! xo
ReplyDeleteUsing the Expedit was GENIUS! I've always loved that Wisteria version - great job, Bryn!
ReplyDeleteLove this idea!!! Can you come to Atlanta and make them for me?
ReplyDeleteBryn! I told you that you'd use that Geometry some day! Beautiful ;) Mom
ReplyDeleteThis is a fantastic tutorial! I made (or, well, attempted to make) a skirted entry table with Dwell's Vintage Plumes fabric a few months ago and just posted pictures of it in my entryway ( http://luisadesignblog.blogspot.com/ ) - but yours looks about a million times better. I love the fabric you used, too!
ReplyDeleteHi, can you share where you got the fabric? I love it!
ReplyDeleteThis type of fitted table cover is EXACTLY what I had in mind, but I wasn't sure how to execute the corners. I like the tab idea, too. I have a foldable table that serves as my cutting table. It's quite practical, but very ugly. To save money, I'm going to use a good quality white cotton sheet I picked up at a yard sale, and trim it out with 1.5" black grosgrain ribbon. Thanks so much for the instructions!
ReplyDelete