

Speaking of painting furniture, do you may remember this piece I found a while back on Craigslist?

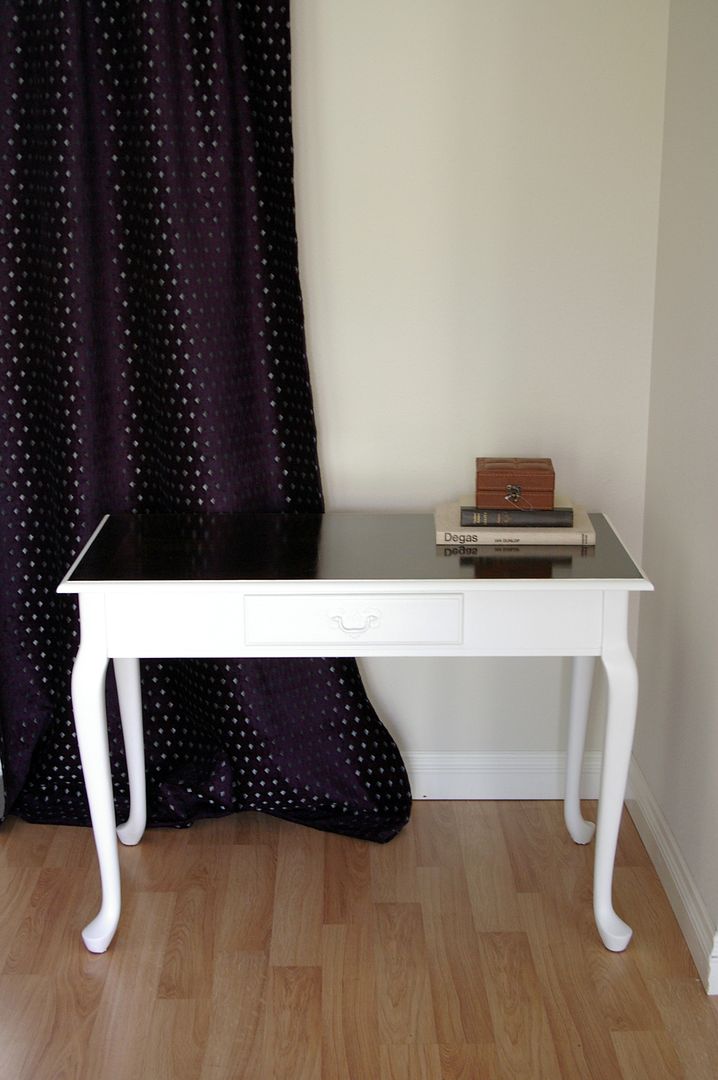
I re-stained the top a deep deep dark brown, and painted the bottom white (including the drawer pull). Here is the after:
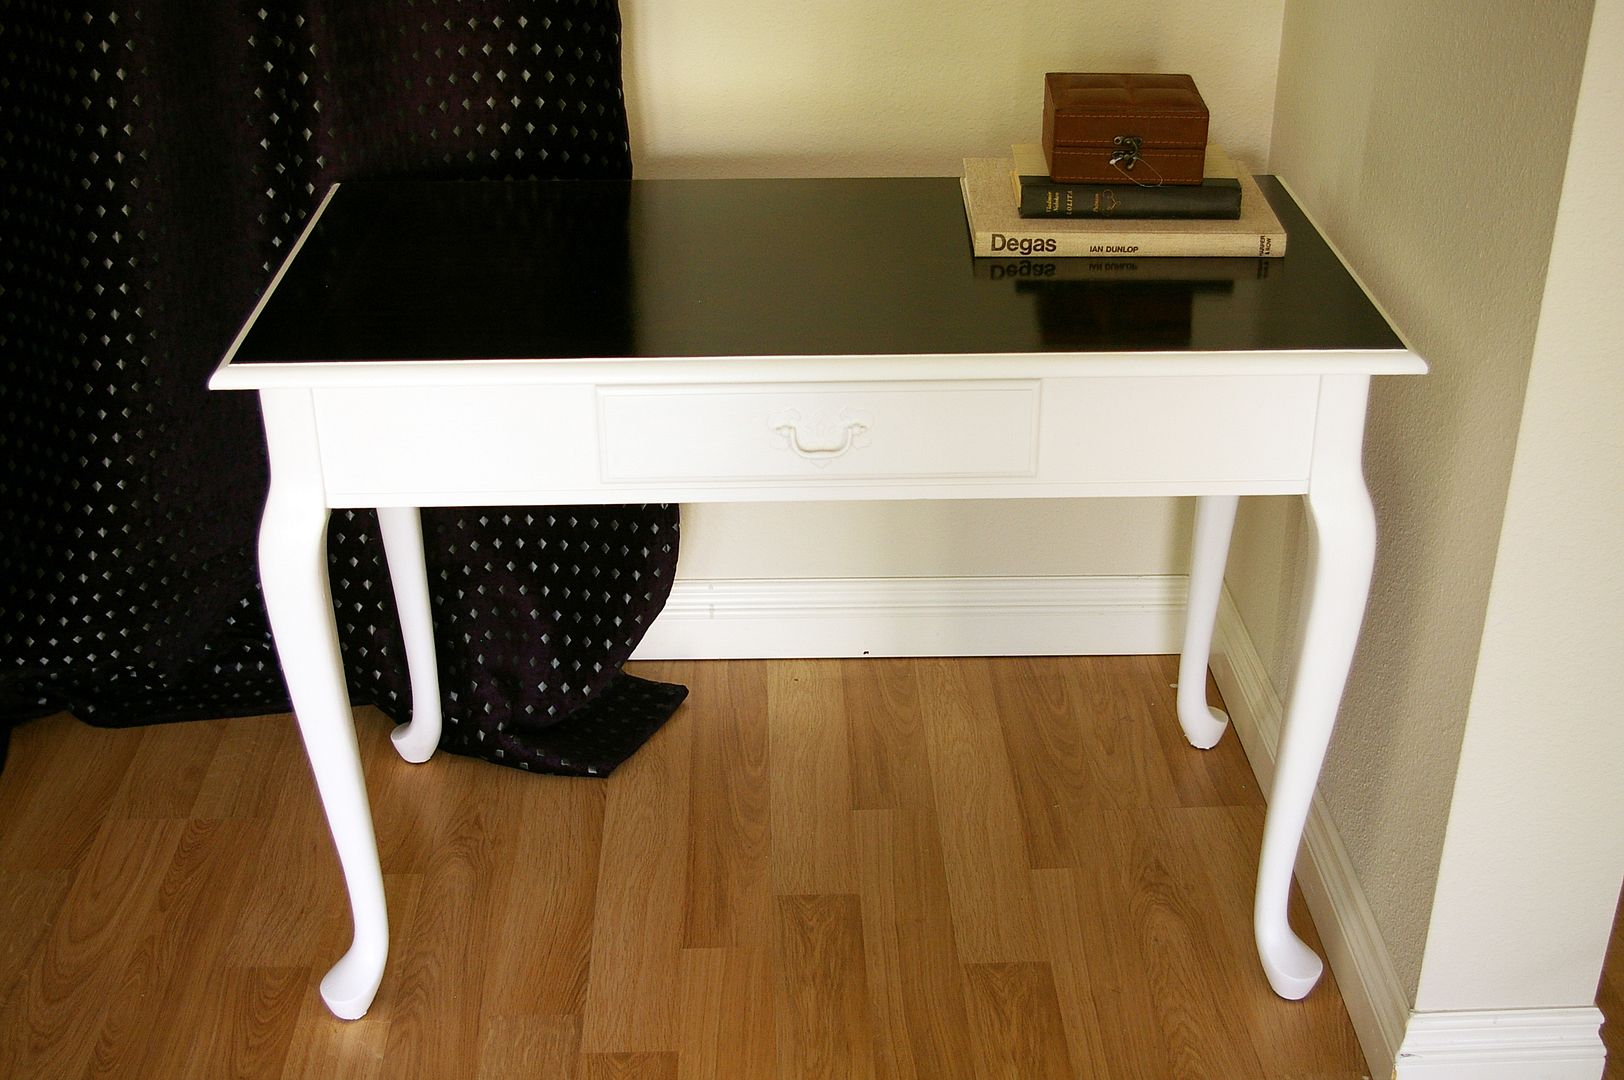
Let's get started....
Step 1 - Clean
If your piece of furniture is old, it probably has layers and layers of "grime". I simply use soap (something gentile like dishwashing soap) and water and paper towels to wipe everything off. A sponge works well too. Make sure everything is DRY before you get started.
Step 1b - Sand
I put this as step "1b" because the truth is, I don't always sand. In fact, I rarely sand. Some people swear that you HAVE to, and some people swear you don't have to. There are certain circumstances when I do:
- Sand if you are staining. If you are staining wood, you must sand down to the base layer, the "naked" wood.
- Sand if there are rough areas, knicks, dents or laminate.
My favorite item to use when sanding are sanding sponges. You can use them wet or dry; I always do dry. They come in different grits, the higher the number the softer the results. If you are staining, first strip the wood of anything with 60 grit. For regular projects, use the 100 or 150 grit sponges first to even out rough areas, then smooth with the 220 sponge. Be sure to get the sponges with the angled sides, they great for nooks on your furniture.


So back to the issue of sanding vs. not sanding. If your furniture is in good shape, you don't need to sand as long as you prime and poly. I've learned this through doing both many times. If the furniture does have any imperfections, I just sand and smooth those areas and leave the rest of the piece as is. Here are some other reasons I usually choose not to sand:
- Let's be honest, it's really hard! It takes a lot of time and energy, even with the electric sanders.
- Even if you do the hard grit and then work your way up to the fine grit, the finish never seems to turn out as smooth as it was before you sanded.
- Lead paint.. I'm always afraid of sanding old painted furniture.
Step 2 - Prime
Priming is an important step. I use Bulls Eye 1-2-3 Primer, I bought a huge tub of it a while back and am happy with it's performance:

I usually do 2-3 coats of primer, depending on the color and condition of the piece of furniture.
Here is one of my specific tips: I always use foam rollers. I get the best coverage with foam rollers, and never get brush marks or air bubbles. These foam rollers are my favorite:

A 6 pack like this is perfect for one piece of furniture. You'll use around two for the primer and around 3-4 for the paint. This brings me to another key point:
I always use a new roller for each coat. Sorry environmentalists out there - it's the only way I've found to really get a perfect finish. Remember, you want to let the paint dry completely between coats, and usually when it's time for a new coat the paint on the old foam roller has dried. I've tried in the past washing the rollers, but I can never a finish as perfect as the first time use.
For small nooks, use these:

These actually clean up pretty well, so you only need one of them. It's really just the rollers I like to replace.
Step 3 - Paint
Let's discuss types of paint first. I always use your basic Interior paint you find at Lowe's, Home Depot, Benjamin Moore, etc. Nothing fancy like oil-based. Just plain latex paint.
I always buy FLAT and use poly as a finisher (I'll get to that later). Flat finish is the best because it's easy to sand (also get to that later) and doesn't show air bubbles or brush marks.
As I just mentioned, an important step in between coats is sanding. Be sure to use your fine 220 sanding sponge for this step. Sand your piece lightly so that any and all air bubbles and strokes are sanded down and the finish is smooth. You MUST wait for the paint to completely dry before doing this step. Typically a start to finish paint job takes 3-4 days because of the waiting.
The job will take anywhere from 2-4 coats, depending on the color of paint. The more coats the better! You'll be able to tell when you've reached your last coat, the color will be rich and perfect.
Step 4 - Poly
So what's poly? Here's a picture:

It's a protective gloss that gives your furniture a beautiful shine and durability. It comes in satin, semi-gloss or gloss. I like all three, it really just depends on what type of look you want. But I usually go with clear gloss.
If you are going to follow any tip of mine, please follow this one: Buy Minwax Water-Based Polycrilic protective finish. The exact stuff from the picture above. I have purchased so many different types of poly's... water based, wipe on poly, regular poly, even those that claim to be completely clear... They all leave ugly yellow stains on your furniture. This is the only poly that leaves your white actually white and not off white. Trust me on this.
I've used both foam brushes and paint brushes for the poly step; I personally like foam brushes because you can toss them out (it's hell getting poly out of one of your good brushes). Just make sure to apply even, THIN coats and you'll be good. Especially watch out for drips, if you don't catch them they will dry and look like teardrops on your furniture :(
Sand in between the coats of poly, too. Except after the last coat of course, or it won't be shiny!
By following these steps, you should have a very nicely painted piece of recycled furniture. If anything is unclear or if I've forgotten anything, please do leave me a comment and I'll respond to all comments in this post for everyone to see.
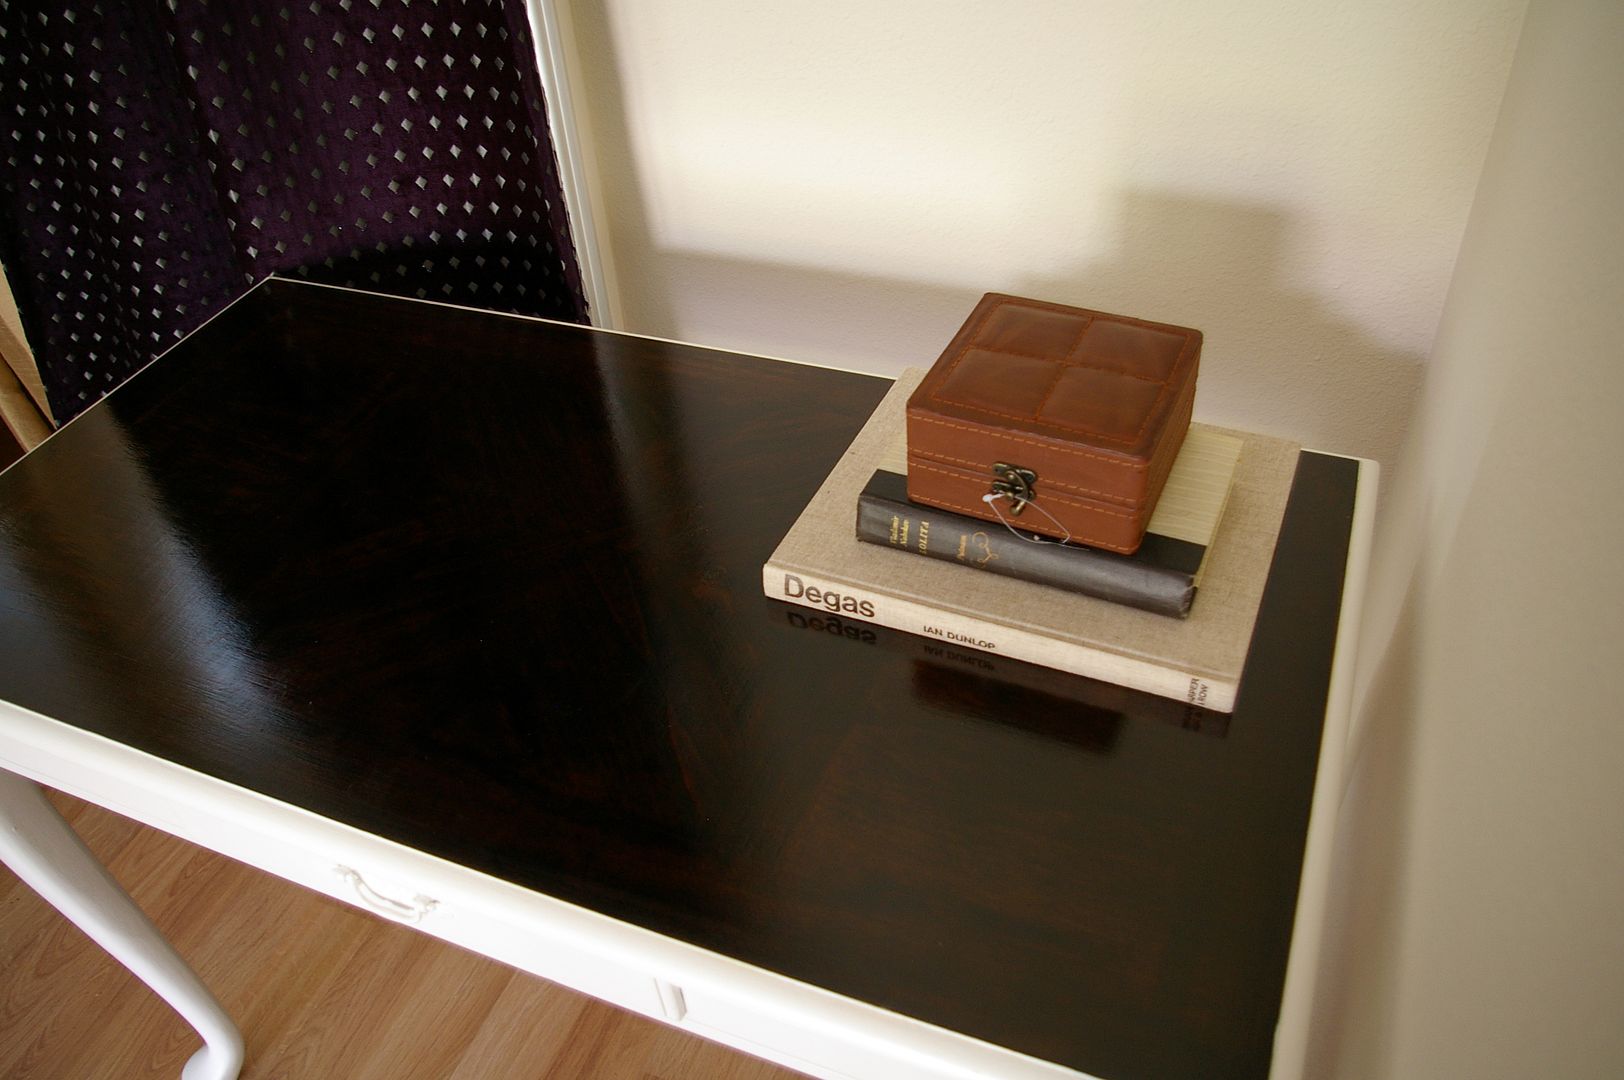
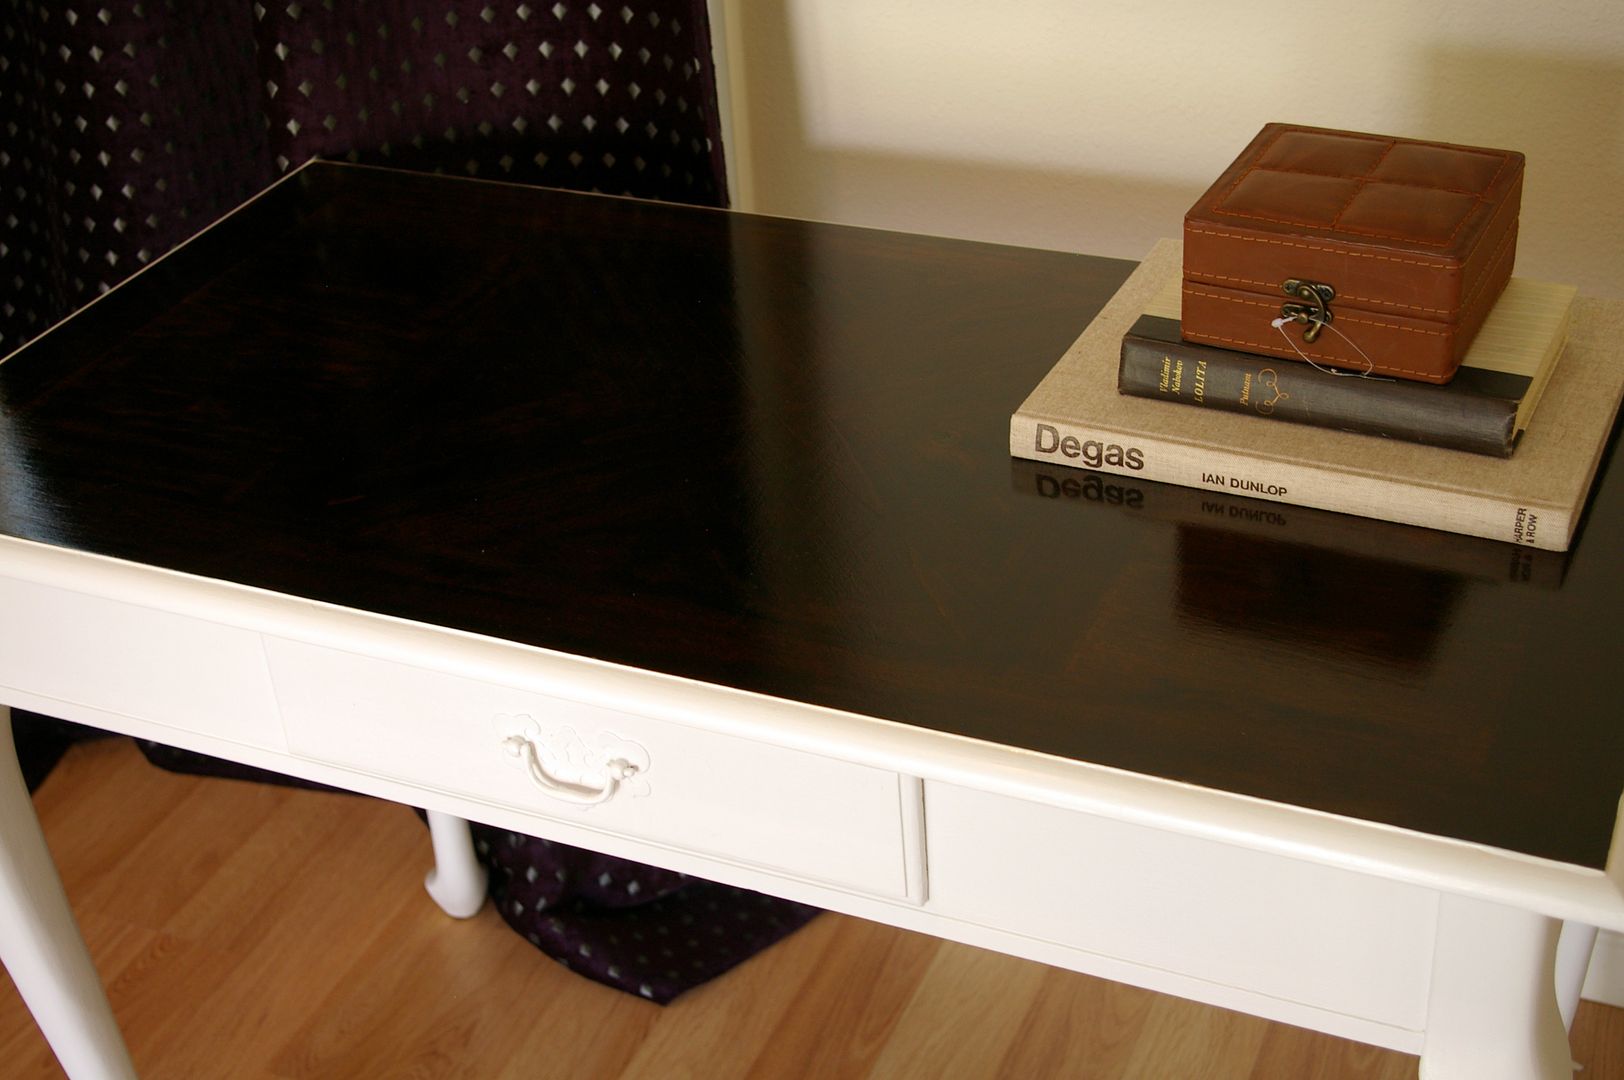
And with that I'll leave you with more pictures of my painted desk:
Updated: Q&A
Q: Bryn, do you have a favorite 'white' and favorite 'black' color/shade for furniture? There's a lot to pick from when it comes to black and white!
A: I actually don't have a favorite black... I haven't ever painted a piece of furniture black before! But when I paint my master bedroom black I'll definitely share which color that is. As for white, I really love Lowe's Valspar Bistro White. It's the white that I used on the desk in this post and it's a really great white and a good price.


Thanks, Bryn! Great step by step tutorial, I wondered about alot of these things. I have yet to find a piece on CL that I want to buy and paint, but its on my to-do list. Thanks for such a great explanation:)
ReplyDeleteThanks for the "how to" Bryn. Lately I've been wondering if I was on the right track. Looks like I was! Isn't the waiting the hardest part? Oh and that desk is awesome.
ReplyDeleteWow, what a helpful post! I have always loved the idea of refinishing old furniture, since new furniture is so expensive, but have been intimidated by the process. You have completely simplified it and taken the fear out of not knowing what products to buy!
ReplyDeletethanks for this helpful post. i'm planning to paint some furniture in the future. one question though: how much ventilation should you have when doing this sort of thing?
ReplyDeleteI absolutely love that dark top with the white base. It makes the desk look so high-end.
ReplyDeleteThanks for this in-depth painting guide, Bryn. This will come in handy in the future. The desk looks amazing. I love that you only painted part of it and stained the top - it looks great!
ReplyDeleteThis is AMAZING! Thanks so much for the tips!
ReplyDeleteLOVELY!! I really like the contrast with the dark stain & the bright white paint.
ReplyDeleteGreat tips too :)
Love the desk! Looks like it has one of those leather blotters on top. The color is gorgeous!
ReplyDeletelovely! Hey, one thing I do to save $ and landfills is I put the roller in a plastic shopping bag and put it in the fridge between coats. Works for me, anyway.
ReplyDeleteOooh thanks for the tips...We painted our first piece of furniture this weekend and I think we did okay. We bought the wipe-on poly but we painted the cabinet black. I didn't know about the yellowing issue, good to know for future projects. Off I go to craigslist...
ReplyDeleteThat piece you did is stunning!
ReplyDeleteThank you thank you thank you!!! I have a dresser that I want to paint and I was completely turned off by the idea of sanding. Your post was SO HELPFUL!! I plan on following your advice exactly.
ReplyDeletep.s. LOVE the desk!!
The desk looks great! I love how you did the dark top with the rest white.
ReplyDeletegreat tips...I really need to paint the piece below my television, you're spurring me towards action with this!
ReplyDeleteInformative post, Bryn. Thanks for sharing your tips! I do pretty much the same thing except I haven't used foam rollers. I'll have to try that!
ReplyDeleteBest. Post. EVER! I too have been afraid of painting because I wasn't sure of the best way to proceed. But you have explained the process so nicely.
ReplyDeleteThanks! And that desk is gorgeous now. Nice touch with the stain on top.
jbhat
I love that you did this post. I have been dying to know how to do this. Thanks for giving such great details. Love your blog!
ReplyDeleteVery chic desk you created... LOVE it!
ReplyDelete~Joanna
Desk looks Great! Bryn, do you have a favorite 'white' and favorite 'black' color/shade for furniture? There's a lot to pick from when it comes to black and white!
ReplyDeleteThis is the BEST post!!!! I have been wanting to paint some furniture, but never do because of the sanding!
ReplyDeleteThank you so much for posting this! I am going to find myself a lovely piece this weekend!
Thanks for the tutorial! I see such fabulous furniture restored via your wwebstie or others and I drool, thinking there is NO way I could ever make it look good. Thanks for the step-by step I hope to use someday!
ReplyDeleteThank you for this post! I was just actually having this discussion with my mother and husband. We have this wonderful living room end table and coffee table that I want to paint black that is currently cream (I am a huge fan of black accent pieces). Your post is really going to help me because I have a few different pieces that I have plans to paint. I am a huge fan of just refinishing what I already have. Projects done to date our my parents old kitchen table (stained and painted black) and my grandfathers old desk! Next are the living room tables and a tv stand! Perfect post! Please more "how you do it" post!
ReplyDeleteBryn - this is an AWESOME tutorial! THANK YOU! I never would have thought of using flat paint first! My sister and I are going to (finally) paint her desk this weekend, so we will be following these steps to a t! You rock!
ReplyDeleteThis is such a useful post! I have always felt a bit embarrassed about how daunting I find the whole painting process, after all, people do it every day! But it's so useful to read a simple breakdown of the process that I feel I can follow easily and I'm excited to give it a try. Thank you so much!
ReplyDeletethat table looks incredible! i want it!
ReplyDeleteThanks for the great post and for giving detailed info on the products you use! So many people say 'poly' but don't specify what type or brand and there are a lot of choices out there. And if you're looking for a way to save a roller, wrap it in plastic wrap. It won't keep forever, but definitely for a day or so!
ReplyDeleteThank you thank you thank you!! This is going to be so helpful. I also do as She's Crafty and bag my rollers between coats of paint. I've never refrigerated them, but I'm going to test that one out soon...
ReplyDeleteChris
Lovely job! The piece has such a great shape. I love the new finish.
ReplyDeleteYou are awesome!!! I am totally going to do this to my new buffet!!! Thanks for all the suggestions:)
ReplyDeleteGreat tutorial! I've refinished a TON of furniture and have always used a gloss finish paint with a gloss poly over it. I have never thought of using a flat finish paint (which I use on my walls and LOVE) on furniture. And I guess if you're covering it with a gloss poly, it will be nice and wipeable. I will try that on my next project.
ReplyDeleteI do have a question, though...how did you get the top so dark with just a stain? What stain brand/color did you use?
By the way, congrats on the big move!
Thanks,
Jill
I have been wanting to try and buy a dresser off craigslist for my daughter and do the whole painting thing but I was so nervous because I had no idea what I was doing and there really aren't that many tutorials out there on it, so thank you so much for doing this tutorial, it is so helpful and your desk looks amazing!
ReplyDeleteHello everyone, great information dying to get started on some bedroom furniture.wood the outside temperature effect the paint, its freezing here, and would be painting in the garden shed?. buy the way what is craigslist?. great table. Nancy
ReplyDeleteI am wanting to paint my desk that I have had now for 10 years and it is one of those laminate wood type desks. We are wanting to make the desk black and it is a maple color right now. I was thinking of just spray painting the whole thing would that work or would it be best to paint it?
ReplyDeleteThank you for the post!! Love the blog!
Hi Bryn - I have a question about poly...have you tried the Minwax Wipe-On Poly and if so, what has your experience been with respect to yellowing painted white furniture? Thanks and love your blog! Alanna
ReplyDeleteHi Bryn, LOVE the tips and love your work!! :) I am planning on refinishing a few good ol' IKEA pieces. They all have an oak veneer finish (I'm planning on painting them white). So will the painting instructions be the same? Thanks in advance!
ReplyDeleteGorgeous desk ~ and thanks for sharing these tips with us! I will definitely refer to them in the future :)
ReplyDeleteYour blog is so useful, I can tell you have put in a lot of work on it.
ReplyDeleteThanks so much for this tutorial! One question: Do you sand in between coats of primer too?
ReplyDeleteTo keep the roller fresh and use it more than once, I find that wrapping it in a bag or ziploc, then storing it in the fridge overnight, keeps it fresh and new!
ReplyDeleteI have tried the foam roller and it seems to leave little bumps. How can I avoid that?
ReplyDeleteJust found a link to this post over at centsational girl's blog. Thanks for the great advice!
ReplyDeleteHi! I got to your post from Emily's blog and so glad I found this. I have been so frustrated with a pretty white painted piece that ended up with yellow streaks after I put on the poly! And I have been sending EVERYTHING! Great tips, thanks for sharing your insights!
ReplyDeleteHi! I came over from emily Clark's blog! Thanks for posting this - it's incredibly informative! Quick question: when you sand in between each coat, do you then wipe down the furniture with a wet paper towel or cloth? I'm assuming you have to, right?
ReplyDeleteThanks!
Emily Clark passed this along, and I'm so glad she did! Great post, thanks for sharing! I might actually be able to tackle the coffee table I've been wanting to paint for several months now!
ReplyDeleteThanks for this awesome tutorial!
ReplyDeleteEmily sent me too and this is an EXCELLENT and informative post. Thanks for Sharing.
ReplyDeleteThanks for the great post! I once painted an armoire white (actually it was a crackle-finish, so a BIG project)--then I poly'd only to have it turn yellow. I am still sick about that one, so I am really glad to have your advice on what brand of poly to buy. Thanks!
ReplyDeleteHi Brynn, What a great "how-to" on painting. I'm keeping this for sure. The first time I ever tried the Polycrylic I ended up with a yellow finish and had to sand the entire piece. After reading the instructions properly I realized I had gone back and forth with my brush which is a no-no.
ReplyDeleteLove the blog! Carol
Hi Brynn, thank you for the great tutorial on painting wood. I recently painted my boys' beds - cleaned, sanded and primed. However, I used spray paint and to my surprise, the paint "wrinkled" so I had to re-sand it down and do it again. Still the same result with the bubbling - have you ever had this problem with spray paint? Mind you, it was about 25 degrees in the garage at that time. I also used polycrilic - the same one above and used a foam brush and sanded but found that it was bubbly. In the end, I just sanded the whole bed back down and just painted it with a regular brush as the finish looked too yucky. Can I just leave a piece of furniture without finishing it off in polycrilic? Sorry for all the questions, I would be interested to hear how you tackled problems with painting. Thanks!
ReplyDeleteHi Brynn, thank you for the great tutorial on painting wood. I recently painted my boys' beds - cleaned, sanded and primed. However, I used spray paint and to my surprise, the paint "wrinkled" so I had to re-sand it down and do it again. Still the same result with the bubbling - have you ever had this problem with spray paint? Mind you, it was about 25 degrees in the garage at that time. I also used polycrilic - the same one above and used a foam brush and sanded but found that it was bubbly. In the end, I just sanded the whole bed back down and just painted it with a regular brush as the finish looked too yucky. Can I just leave a piece of furniture without finishing it off in polycrilic? Sorry for all the questions, I would be interested to hear how you tackled problems with painting. Thanks!
ReplyDeleteAwesome tutorial!!! I'm using it to paint a vintage table and matching chairs a glossy black. The legs on the table and chairs are similar to the legs on your desk and the table is oval shaped with scalloped edges. I'm also going to reupholster the chairs with a cheetah print fabric. Hopefully I'll be done by the end of the week and have the pictures posted on my blog, Maison Creole at http://maisoncreole.blogspot.com/. Thanks for the help!!!
ReplyDeleteI love it. your steps were so helpful. Saving this website as a favorite.
ReplyDeleteThis is great. Your table looks new and much beautiful.
ReplyDeleteThank you for your advice on painting furniture. I'm painting a solid wood desk I found for my daughter for $20 at a garage sale. It's a nice old Thomasville desk with a few scratches. The only problem is that it has a laminate on the top. I'm thinking of painting all but the top and simply sanding and staining the edges a dark wood tone. Not sure what to do with the scratch on the laminate top though.
ReplyDeleteFinished the desk with very nice results thanks to great advice. Decided that the laminate top would be great for schoolwork and crafts so I just lightly sanded it and added poly. My daughter's favorite color is green so I had fun transforming the desk from blah to fabulous!
ReplyDeleteWhen I paint my own furniture, like my porch swing, things usually don't come out as planned. That's why I don't want to try anymore. But I would still like to learn how. Thank you for sharing your techniques. Someday, I'll try painting my couches.
ReplyDeleteCan you come over and do mine??
ReplyDeleteWow I'm in l0ve with your paint job...the colors are awesome together ♥
ReplyDeleteI realize the post is over two years old, but it's one of the best how-to-guides I've found for painting furniture. Thank you for your insight.
ReplyDeleteI have a sanding question. Do you typically sand your final coat of PAINT...meaning the last coat of paint that is applied before the Poly?
Also, have you ever tried applying the Poly with a foam roller instead of a foam brush? I know you prefer the roller for painting, but what about poly-ing?
Wow, that desk is beautiful.
ReplyDeleteI'm working on a painting project at the moment, and I have done two coats now (with sanding in between) of the minwax polycrylic. I had bubbles on the first coat :( and now on the second coat too!! :( :( What is going on?? I'm getting frustrated with this project now, so if you have any ideas why I'm getting bubbles, I'd *really* appreciate it. (The first coat of polycrylic was with a new foam roller, but still had bubbles.)
I post about how your table inspires me today on my blog. I linked back to this page, come and check it out!
ReplyDeleteMorgan
http://missdiymonster.blogspot.com
Sometimes
ReplyDeleteI stumble upon a blog post that perfectly answers a question that brought me
to perform a search in the first place - your post is a good example of such
a happy encounter. Thanks! :-)
SEO Melbourne
Thank you so much for this tutorial! You saved my project.
ReplyDeletehttp://smithocracy.wordpress.com/2012/09/24/its-neat-to-have-a-seat/
Do you have to sand? Or can you use primer and paint and then poly? I'm also confused about how you can sand once the poly is on? Doesn't that ruin your piece? I have a brand new desk I got for a bargain that is pine but I want to paint it white. Any tips you can give me would be great! Also what about an eggshell paint? Or is that overkill?
ReplyDeleteThank you for explaining how I can use interior house paint on my furniture. My chairs are going to match the walls!
ReplyDeleteThis is the best post on painting furniture that I've seen. I've been putting off re-painting a very large desk for our master bedroom/home office and this post has inspired me. It won't be as hard as I thought, just time-consuming! If I'm re-painting a piece that's less than 10 year old (it was bought as unfinished furniture and then my mom had it professionally painted), do I still need 2-3 coats of primer or will one do it?
ReplyDeleteThanks again!
Great post with nice details. I really appreciate your idea. Thanks for sharing. Hospitality furniture
ReplyDeleteGorgeous! Thanks for posting the step by step. I do have one question though. I'm working on my dresser and have now put the first coat of poly on it. I'm just unsure about the sanding part. This might sound a bit dumb but wouldn't the paint come off when you sand it? I'd really appreciate your help. Thanks!
ReplyDeleteHi. The step 4 photo is missing? Can you tell me what the poly is you used?
ReplyDelete