

I've been working on the home office for one of my clients. She works from home so the office must be super functional. I decided to have two desks for her - a "work" desk for her 9 to 5 and her "life" desk for everything else.
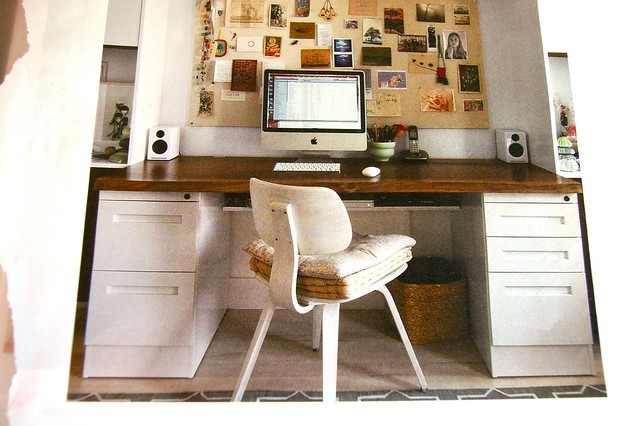
For her "work" desk, this was our inspiration:
I went with these elements from IKEA to "build" her desk:
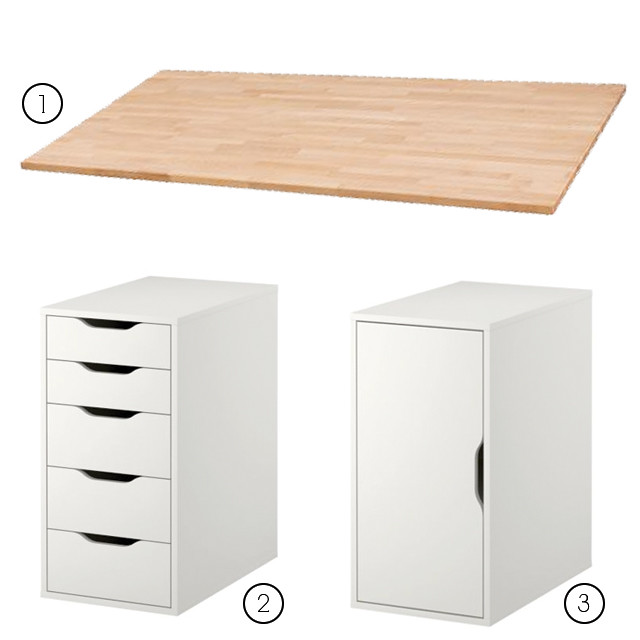
1, 2, 3
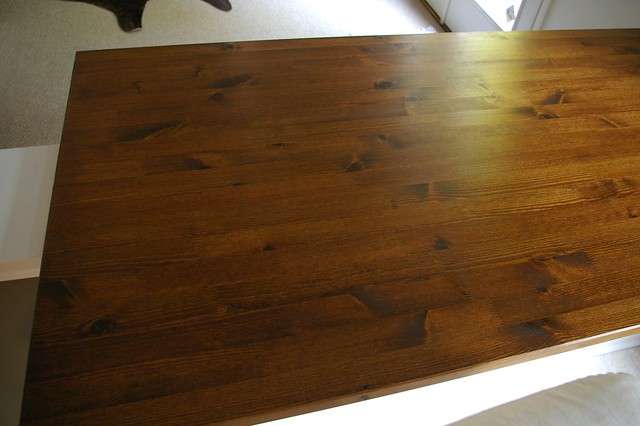
When I purchased the top, I knew I would have to stain it to achieve the same look as the inspiration picture. I was, however, pleasantly surprised to find the desk top to be in it's completely natural state - no sanding was required!! Hence the "quick and easy" part of this DIY.
I pre-treated the wood with this:

I then used this stain:

The color is "Early American" and the little can is more than enough for this project. I used two coats and followed the instructions on the can.
Once the stain was completely dry, I used two coats of this (again, following the instructions on the can):

I used satin because I just wanted that subtle glow, like well-oiled wood. I'm not a huge fan of gloss on wood.
And here is how it turned out - very similar to the inspiration picture!
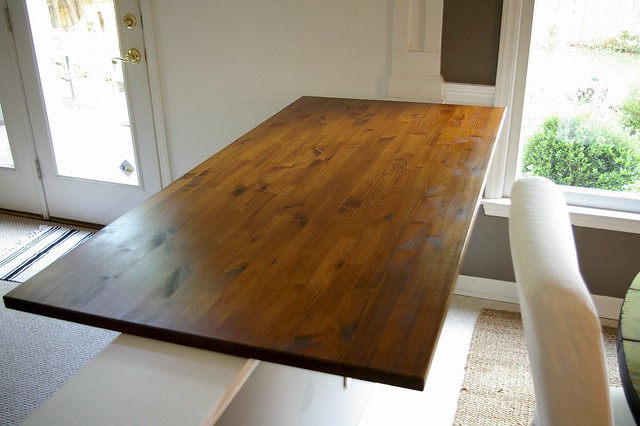
I snapped this picture last week after putting together the desk storage pieces:
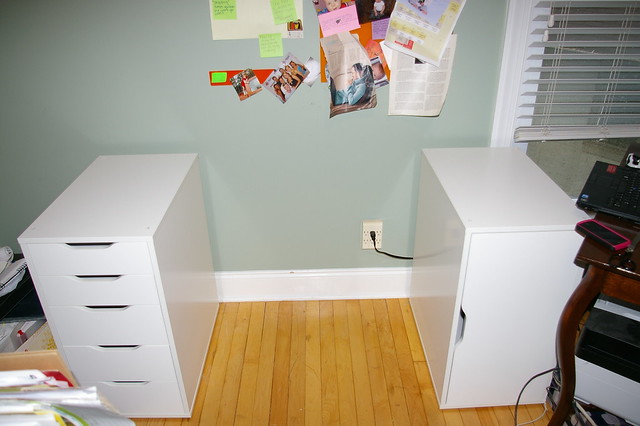
I'll be bringing their top over later today :)
I pre-treated the wood with this:
I then used this stain:
The color is "Early American" and the little can is more than enough for this project. I used two coats and followed the instructions on the can.
Once the stain was completely dry, I used two coats of this (again, following the instructions on the can):
I used satin because I just wanted that subtle glow, like well-oiled wood. I'm not a huge fan of gloss on wood.
And here is how it turned out - very similar to the inspiration picture!
I snapped this picture last week after putting together the desk storage pieces:
I'll be bringing their top over later today :)


Oooh, I'm excited to see the final results. The stained desktop looks great. Can't wait to see how you style the desk, Bryn.
ReplyDeleteFabulous! Good to see the Ikea butcher block stains well, I've been considering it for a similar project I've been working on, a counter to place over a line of four filing cabinets.
ReplyDeleteThis will look just like the inspiration picture, don't you love finding an affordable way to get a great look?! Janell
Defiantly easy! I love that Ikea is always good for so many different styles! Can't wait to see if finished!
ReplyDeleteTiffany {Living Savvy}
www.savvydesignwest.com
Love this! We recently purchased an "unfinished" pine table from idea for our kitchen with the plan to stain or paint it. With how good yours turned out, I am leaning towards staining. Looks beautiful!
ReplyDeleteThat's so funny, I literally bought those same cabinets this past weekend to go under two long stained boards - it's acting as a console table that goes behind my desk. Your client will love it, it works great!
ReplyDeleteHi Bryn, This is beautiful! What type of wood did you use? The link is for beech wood. Is that what you used for this project?
ReplyDeleteThanks!!
Haha, I just did a variation of this project myself except that I used the Vika Alex for one leg and built a bookcase for the second leg (as I couldn't find one with the right measurements). I put it all together last night and I am THRILLED with my new, large workspace.
ReplyDeleteooooh, I just bought two of those tops for my new desk. Might have to jazz them up now.
ReplyDeleteReally lovely! It looks like your project will turn out just like the inspiration photo. Lucky client! And thanks for opening my mid to light woods like pine or birch....oh the possibilities!
ReplyDeleteLooks nice.! I have the same desk. We have three of the Alex drawer systems and a hollow door that has been stained as the top.
ReplyDeleteLove! We did something similar using ikea, but made it a LOT bigger...
ReplyDeletehttp://aubreyandlindsay.blogspot.com/2009/08/making-new-desk.html
loving it!!!
ReplyDeleteI'm dying to see how this turned out! I've been planning a very similar project, but have yet to make it to IKEA. This is definitely giving me some motivation...
ReplyDeleteCan't wait to see the results, I'm also looking to buy/make a work desk for our office!
ReplyDelete